
Officially the CATIA Data Upward Assistant, as part of CATIA V5, has a number of helpful uses. These double when working with 3DCS Variation Analyst CAA V5 Based, integrated in CATIA V5-6.

Some of the handy uses of CATDUA V5 are:
To run CATDUA from inside CATIA, go to the Tools heading, and select Utility from the drop down.

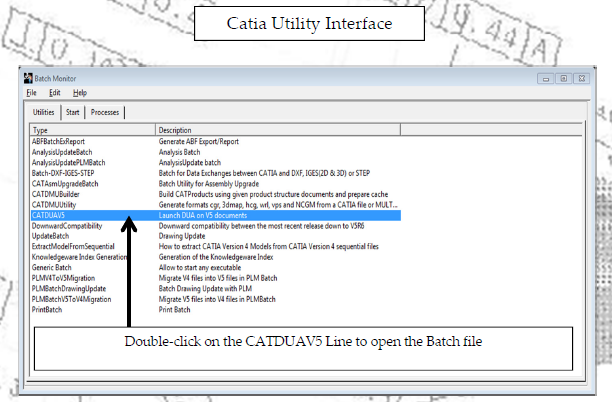
Sometimes you want to repair a model before opening it or CATIA. This can be done with the CATDUA batch mode. For Windows users, use the start menu to select all programs and find the CATIA folder. Inside the folder, go to the Tools folder and select Batch Management V5R20.

Once the CATIA Utility Interface is open, Double-click on the CATDUAV5 line to open the Batch file. The Batch file is where the magic happens.
After selecting the CATDUAV5 option, the following interface will open.
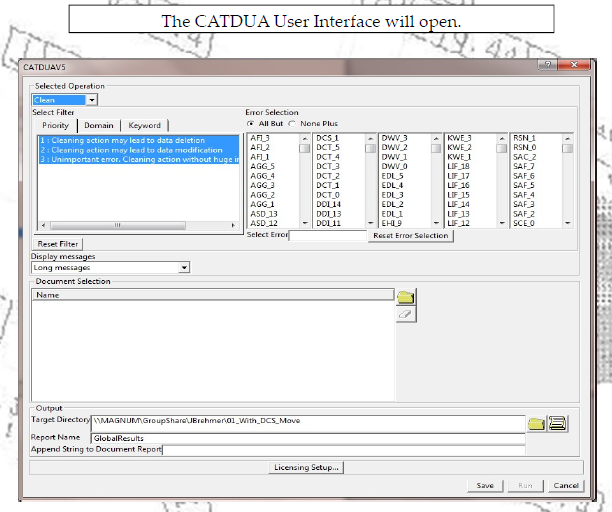
There is a lot going on in the CATDUA tool. here is a walkthrough on all of the different menus and windows.
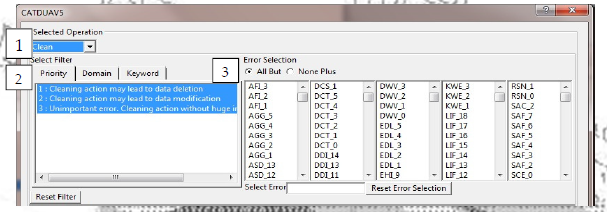
1. Change the Operation to Clean
Check - Will only look for errors in the selected files/folders
Clean - Will remove any errors in the selected files/folders
2. Make sure all Priorities are selected for the Filter (default).
Priority (tab) - Basic check/clean filter
Domain (tab) - Change the error selection by workbench, (i.e. Assembly Design)
Keyword (tab) - Changes the error sleection by a suggested list of keywords (i.e. ghost links)
3. Error Selection - As default, "All but..." will be selected.
a. All but... - All errors will be used to check or clean the selected files.
b. None plus... - Slect specific errors in the list to check/clean with only specific errors.
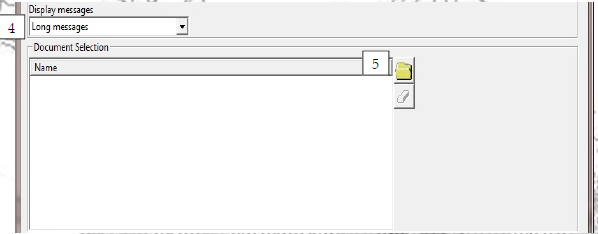
4. Display Messages
a. Change to show long or short messages in the error results
5. Folder
a. Select the folder icon to select files (parts and assemblies) to Clean.
And you thought this would be simple.

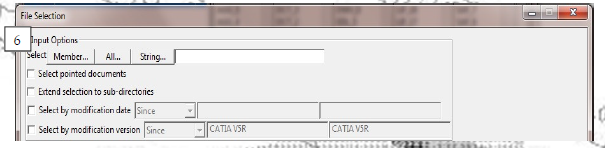
6. Input Options - Select All... and locate the folder of CATIA parts or products that need to be cleaned. Select Select Pointed Documents as well.
a. Member is for selecting a specific file.
i. For example; the assembly you created is loading fine but a part in the assembly is loading with tons of errors, causing CATIA to crash. It may be looking for ghost links and parts that are no longer available. Using CATDUA and selecting that part will clean it for any errors and keep it in the product structure.
b. All will select any CATIA featured files in a specific folder.
c. String is for selecting a specific file type.
i. For example; typing in CATPart or CATProduct and selecting the String button and a folder will load any CATParts or CATProducts into CADUA from the folder to be cleaned.
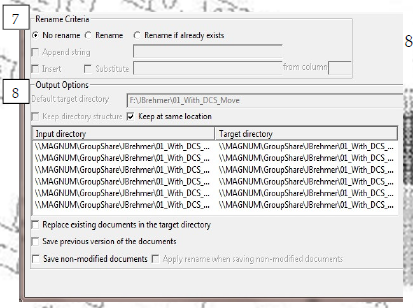
7. Rename - (Optional) Change the name of the file(s) and save to a specified folder. Remember, any name change will apply to unmodified files as well.
8. Output Options - (File selection)
Select OK when finished.
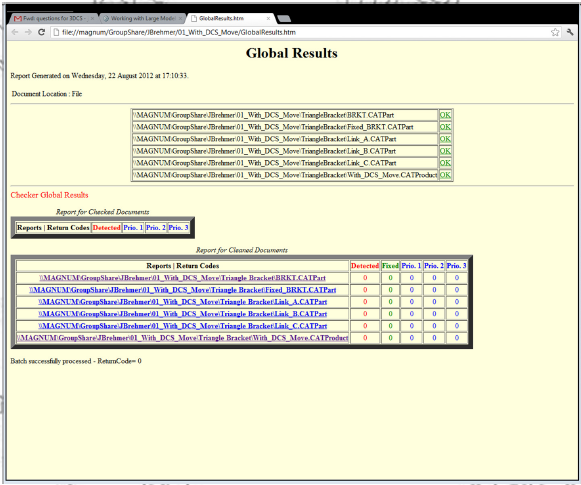
So what do you get out of it?

10. Output Options - (Results)
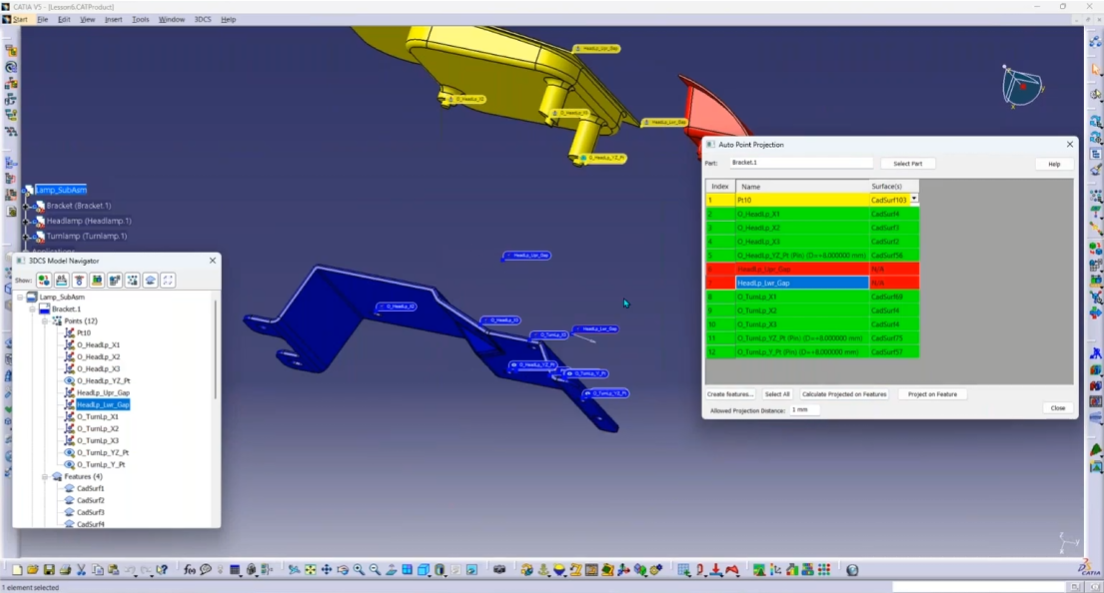
Click to learn more about how you can bring your Dimensional Analysis right into CATIA V5-6 or download the brochure below


North American Innovation Center
28064 Center Oaks Ct A, Wixom, MI 48393
Call us: +1 (248) 504 6200


No Comments Yet
Let us know what you think