3DCS in CATIA V5 Tree Modification, Part 1

Replacing significantly modified subassemblies in CATIA
What happens when you delete and replace a subassembly with one that reflects a different process?
Many hours can be invested and lost trying to replace a heavily modified subassembly using the CATIA commands and the Tree Link Wizard. Furthermore, this method can cause excessive loss of feature links. The Tree Link Wizard is meant for updating the model after a single part or sub-assembly is moved or replaced. In fact, when moving multiple sub-assemblies, Update Model and the Tree Link Wizard should be used between each step.
This Tips and Tactics is a work around to get your subassembly with 3DCS replaced and updated without tree linking and feature linking. If you’re just replacing the same subassembly without name or structure changes, this work around usually isn’t necessary.
With this work around, MTMs at the higher assembly levels will need to be checked and possibly corrected. 3DCS Excel export can be used to easily fill in some vacancies caused by this work around since some MTM items (Moves, Tolerances, and Measures) will likely be left with missing Object and Target points.
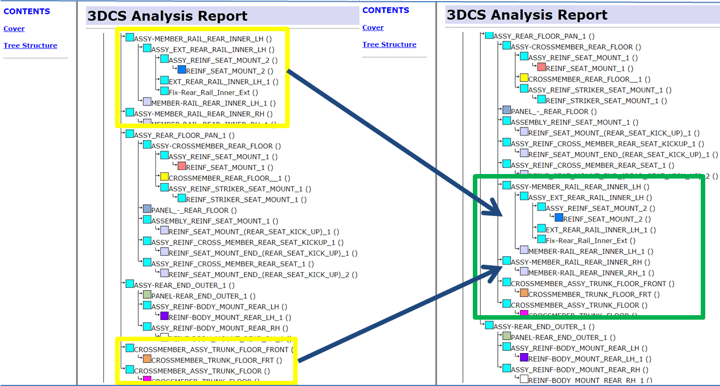
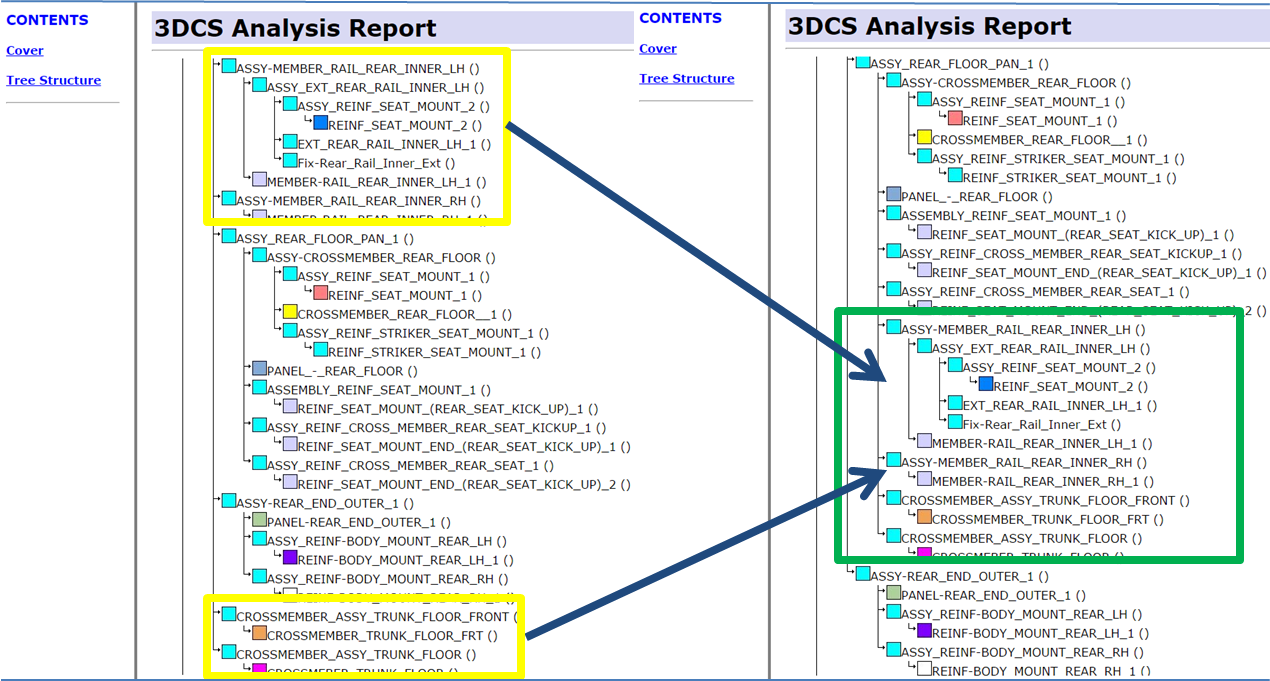
- Modify the subassembly as desired and save to a new folder (Propagate Directory), then close the subassembly. See below example images of Trees. Parts in Yellow boxes (left) under the assembly are going to end up arranged as in this green box (right) under the subassembly, within ASSY_REAR_FLOOR_PAN_1.

- Open the highest level assembly product.
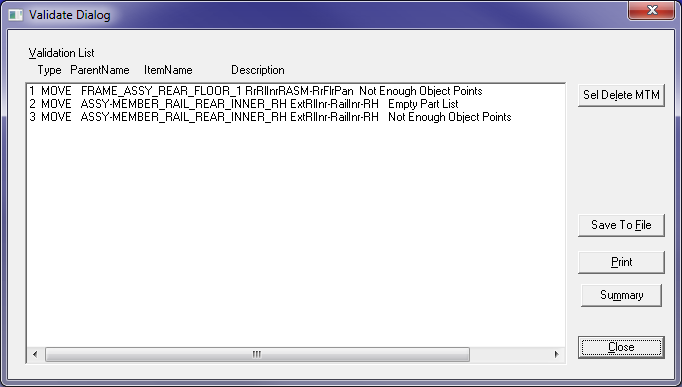
- Validate the model (do not report Inactive MTMs in Validation)
- Export model info to Excel. Save this workbook for making corrections and validating the model update.

- Delete the subassembly product to be replaced. When prompted at the beginning of the Delete dialog, select Delete all Children and continue. Consider saving this interim product as new (with Propagate Directory).
- Update Model.
- When prompted, to remove lost links, use the Tree Link Wizard to Set ALL as Delete from Saved Trees.
- Insert the new subassembly product.
- Update the model again.
- Validate the model to identify unloaded DLLs. Use the User DLL dialog to load if any are found.
- Validate the model to identify broken MTM items. If only a few MTMs are broken, then click on each one in the list to repair it by selecting the lost features from the new sub-assembly. You can use the saved Excel workbook for reference. Otherwise, continue to step 5d.

- Export model to Excel. Compare this workbook to the workbook from Step 2. Fix the broken links in the new workbook by copying point and feature names from the first workbook. Copy the part names separately and use the new instance names. Below the missing features are filled in yellow to highlight the cause of the validation error. This is the same MTM shown in Step 2.

- Compare the two workbooks for missing Move Parts and missing features in MTMs that do not have set numbers of features (e.g. Two Point List measure.) Copy these as well.
- In 3DCS, use the Read from Excel command.
6. Update model again.
7. Validate once again. The model should validate now as well as it did in Step 2. If you did not use Propagate Directory in Step 3, consider doing so now. Otherwise, simply save the model.
Download the article (it's a little easier to read) to share with colleagues

Article written by Jamie Dutton, edited by Brenda Quinlan
Sign up for DCS's newsletter (http://www.3dcs.com/mailing-list.html) to get each month's Tips and Tactics and DE Focus right to your mailbox.
Questions? Call or email DCS, and we’d be happy to help.
DCS Dimensional Control Systems
580 Kirts Blvd ste 309
Troy, MI, 48084
(248) 269-9777


No Comments Yet
Let us know what you think