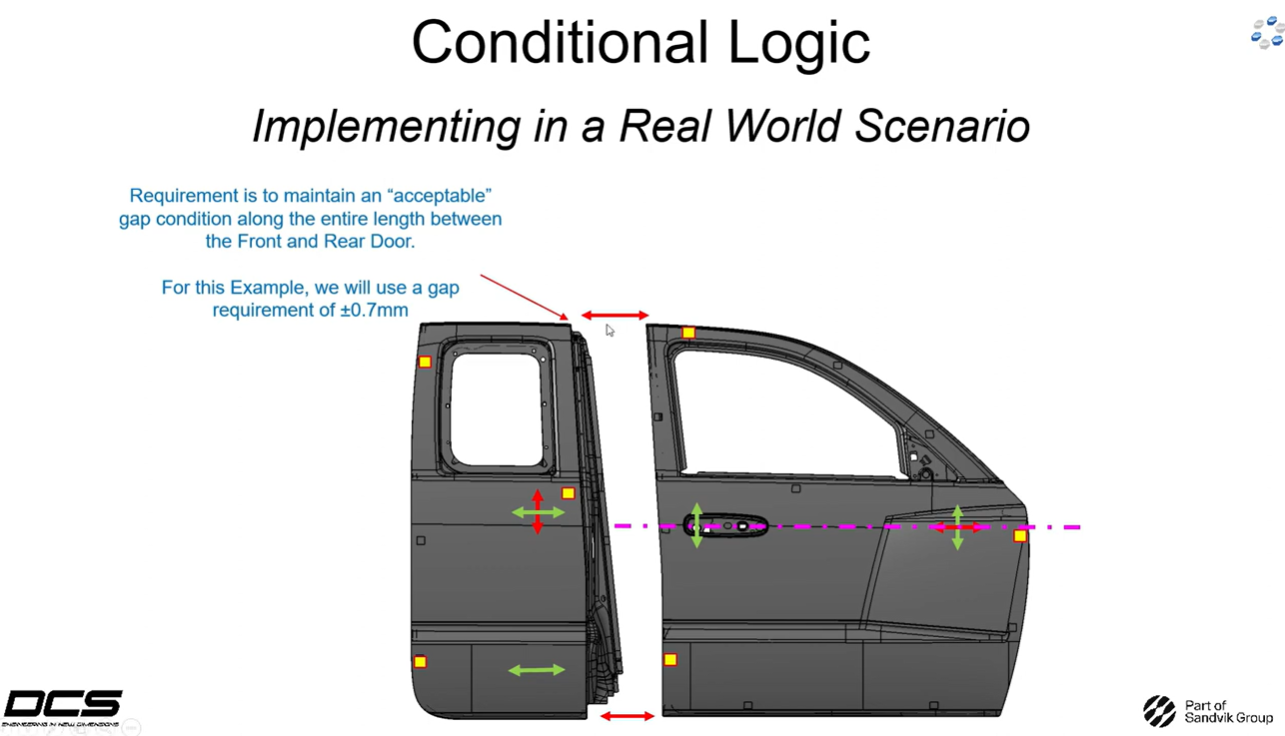
This is the second video on the topic of using Conditional Logic. In this walkthrough video we will expand on the concepts and skills learned in the first video and implement them using a real-world scenario. In this case, the scenario is within the auto industry, but Conditional Logic within 3DCS has uses across all industries.

As the final assemblies of vehicles are brought to the body (doors, hoods, fenders etc.) certain gap and flush features will be checked to ensure they are within spec to maintain quality during production. If the features they are checking are out of specification it is common for an adjustment to be made using a fixture tool. That tool will adjust the assembly which will then turn a critical feature from out of specification to in specification.
This video will demonstrate how to model an adjustment being made to ensure that a gap requirement is being met between front and rear door assemblies. To begin the video, the overall concept of why and how an adjustment needs to be made is explained. Then, the initial moves are reviewed and the user becomes familiar with how the model works before any adjustment is made. In this case, both door assemblies are located to their own fixtures. Once the moves are reviewed, a simple door-to-door gap measurement is added that will be the focus of the video.

After the “baseline” of the model is explained the user will learn what needs to be added to replicate the adjustment and how to set up a move operation that will execute the adjustment using Conditional Logic. Once the adjustment is added the initial gap measurement will be looked at again to see the result improve significantly to be within specification.
These Stories on CATIA
No Comments Yet
Let us know what you think