
Tired of moving from Assembly Design in CATIA to 3DCS and back?
Looking to consolidate your tools together for ease of use?
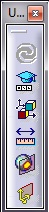
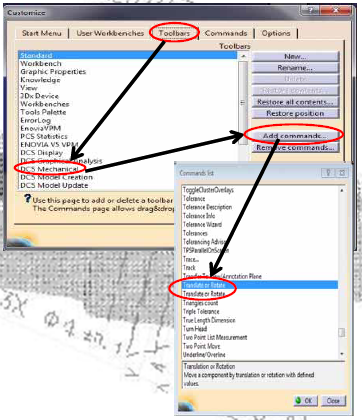
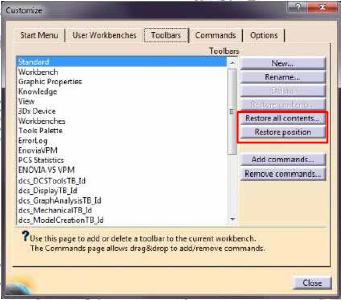
Here is an easy way of bringing in CATIA V5 toolbars to 3DCS. This will allow you to assign toolbars from CATIA to the DCS workbench as well as bring in specific functions. You can also create your own toolbar with any of the commands available*.
*NOTE: You will not be able to add commands from Part Design or Generative Shape Design
 In addition to moving your toolbars over and making your own, this T&T will show you how to reset your workbench configuration and toolbar setup. This can be helpful if, for example, a toolbar is missing and does not appear after turning it off and on again. Resetting the configuration brings all of the toolbars back into their default position.
 Begin by opening a new product in CATIA and changing the workbench to 3DCS.
 Start by opeing a new product in CATIA and switch over to the 3DCS workbench.
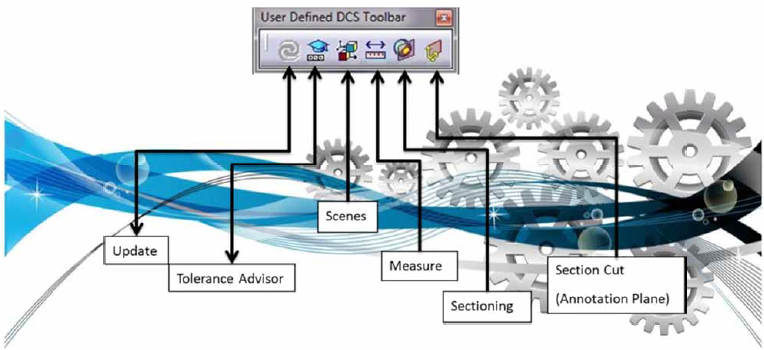
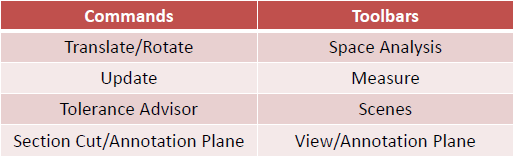
And that is it. To get you started with customizing your workbench, here are some helpful Commands and Toolbars we recommend adding.
North American Innovation Center
28064 Center Oaks Ct A, Wixom, MI 48393
Call us: +1 (248) 504 6200


No Comments Yet
Let us know what you think